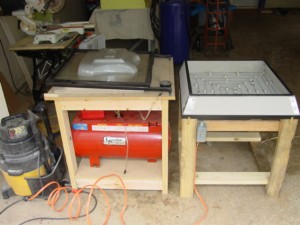
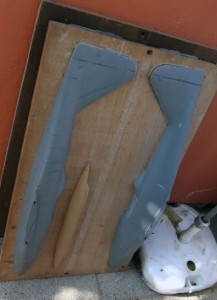
In the context of this series, a ‘vac’ kit is where the primary components are manufactured using a vacuum molding process. Instead of parts formed from the injection of ‘molten’ polystyrene plastic under extreme pressure into heavy steel cavity molds, ‘vacuformed’ parts are made from styrene plastic sheet, heated until malleable and then ‘sucked’ either into or over mold forms using an air pressure differential (aka a vacuum.)
Vacuformed products are familiar to most everyone. Protective plastic trays in food packaging, the ‘bubble packs’ of toys in the discount stores, all are common vac’ed forms for anything that doesn’t require a reusable container. By creating a custom formed clear plastic shell, the product can be packed for easy display and handling with a minimum of fuss or expense (I suspect that packaging inserts is the primary use of vacuforming technology these days.) Another variation is “blow-molding’ where the softened plastic sheet is ‘blown’ (instead of ‘sucked) into a surrounding cavity (almost like inflating a latex balloon.) Milk ‘jugs’ and water bottles are common blow-molded products but even model kit components have used this method. Many modelers will remember the vacuformed plastic ‘billowing sails’ that came with many sailing ship models and were a challenge to use due to being essentially paper thin and fragile.
In essence, plastic vacuum forming is pretty straight forward. The molds used are also much simpler than for a standard injection molded kit as they are one sided and don’t involve any moving parts. Being only one sided (injection molds are of at least two parts), vac molds are subject to much less heat and stress and hence can be made of much lighter materials such as fiberglass, epoxy or even plaster and are typically cast and not machined. The result is a significantly lower production cost which helps explain why vacuform packaging is used for cheap, high volume toys (which are often, ironically, injection molded.) Low cost, fast production and light weight are all advantages to industry. But what does this mean for modeling?
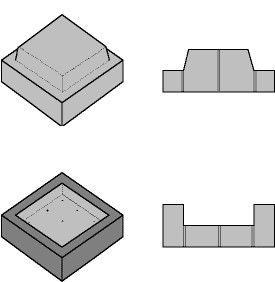
First, to cover some basic concepts: Vac kits can be made either using ‘male’ or ‘female’ molds.
Like with plumbing and other such things, the ‘male’ version sticks “out” while the ‘female’ version sticks “in”.
Male vac molds, or ‘forms’, are ‘positives’ of the desired part so the plastic sheet is draped over the protruding shapes, which are usually secured on a flat backing ‘board’ that is perforated to allow the air to be sucked out between the mold and the plastic, drawing the heated plastic tightly around the form. This is commonly used in packaging because the original product can literally serve as a ‘master’ for the needed shape. For modeling, male-molded parts have a few drawbacks and only one real advantage – speed – though some like the simplicity of the male molded product.
One obvious drawback is that male molded parts lack any external detail. Because the parts are formed over the mold form (essentially the sheet forms a ‘skin’ around the form) the form cannot be made exactly to size – the thickness of the ‘stretched’ plastic sheet must be accommodated and any surface detail is apparent on the inside of the part. Variance in the amount of ‘stretch’ can result in inaccurate parts and somewhat less precise fit. Hence, care and considerable experience is needed to allow the proper offset in the mold forms as well as good design to prevent the mold from being ‘trapped’ within the molded part.
Home-made replacement canopies are typically male molded because the original injection molded part is used as a form without much alteration, resulting in a slightly larger but much clearer part. The smaller the part, the more significant the size differential is to the final fit.
Female molding is more complex to achieve because the (full sized) original shape is ‘cast’ to form the cavity of the mold. For male molds, the original shape (carefully undersized) can be used directly as the form. It is the ‘casting’ step that makes female molds more expensive and complex to fabricate. However, since the cavity will capture all the surface details of the original ‘master’, a well engineered female mold allows for surface texture comparable to an injection molded kit (it also makes the thickness of the plastic sheet a moot point.) However, the mold must be crafted to a high degree of surface finish and kept clean since even a stray hair can show as a ‘surface feature’ on the molded parts. Additionally, the part cavities must also have suction holes in order to get the proper draw, resulting in tiny ‘pimples’ on the part surfaces. Such things don’t bother a ‘male’ mold very much since only relatively ‘gross’ features will be apparent through the plastic.
Obviously, male molds can offer faster fabrication through simpler tooling but result in more difficult ‘craftsman’ builds because of fit and detailing issues, while female molds offer nicer parts but trickier fabrication of molds and more fastidious production. Your call!
Aside from the parts, vac kits are pretty conventional ‘multi-media’ affairs. Smaller parts may be offered as cast metal or resin or even injection molded plastic, as with the early range of 1:48 & 1:72 scale kits from MPM. Less sophisticated kits may attempt to provide items such as wheels, landing gear legs and propellers as vacuformed parts. While workable, the labor involved turning these into usable parts can be bothersome. There is an unappreciated benefit to the builder, however, since they are ‘forced’ to learn how to fabricate stuff from ‘scratch’ using metal tube and rod, wire and raw plastic styrene sheet and rod – modeling skills that are useful in general. In short, vacs can provide what is typically called a ‘learning opportunity’.
Lastly, there is a spectrum of quality associated with the decals and instructions provided with vacuform kits. Instructions might be as little as a hand drawn exploded diagram showing general parts arrangement or as much as a full ‘pamphlet’ style construction sheet giving detail images, history and markings information to assist the builder.
Early on, the lack of decals presented companies like Microscale an opportunity to develop ‘aftermarket’ markings of both generic and specific selections useful to the vac builder. This logically grew into decals designed for specific injection molded model kits, further leading to today’s extensive aftermarket decal industry. Similarly, other aftermarket accessories such as detailed resin cockpit sets and wheel sets are an outgrowth of the ‘generic detail parts’ market catered to by companies such as Aeroclub, with pewter metal props, engines, wheels and guns. In effect, the desire for unusual and unique model subjects, originally engendered by the vacuform “cottage” maker, has spun off a whole subset of the hobby dealing with variety, enhancement and options beyond the standard “mainstream” offerings.
<Go to Part 1 Go to Part 3>


2 Responses to Vacuform Aircraft Modeling – Part 2