
I have to say I really have been enjoying our club’s annual Build Challenges as they indeed challenge me to get something “done” by giving me a deadline. Admittedly, I have only been ready once out out of the past four years but this is nonetheless an improvement for me. Well, enough of the ‘touchie-feelie’ stuff, here is a photo essay of what I did to build my 1/48 scale (my favorite!) version of a SF3D style armored recon scout craft for the 2017 “3-Kit Mashup Challenge”:
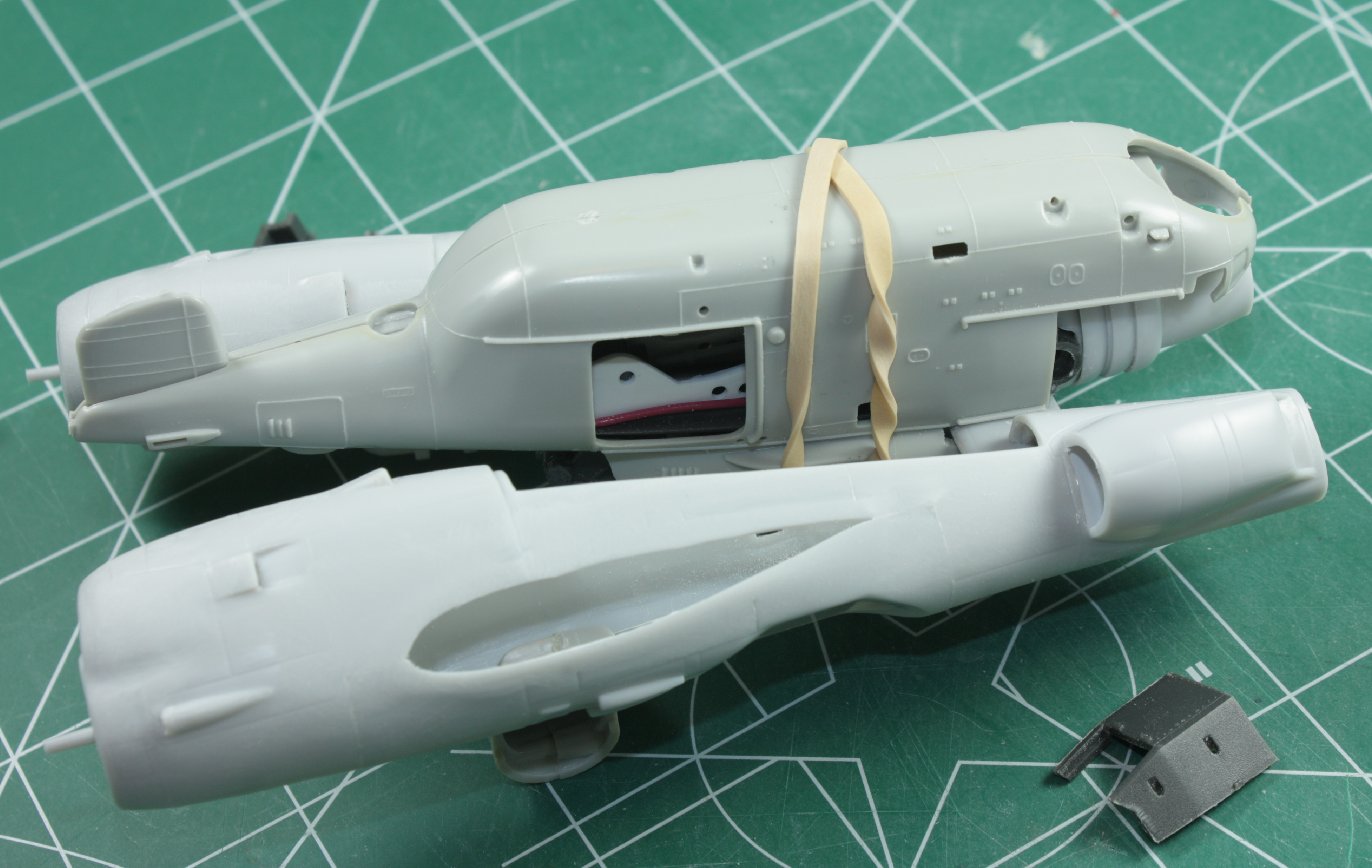
This view shows the essential configuration for which I was going using a Minicraft 1/48 scale F-5A (aka ‘P-38’) Recon Lightning, an Airfix 1/72 Ka25 Hormone helo and a Fujimi 1/76 scale Stug IV kit (which also included a Swimmwagen in the box – sweet!) The central ‘pod’ is the upside-down Ka-25 fuselage flanked by the trimmed P-38 engine booms. I’d already started adding some sheet plastic details to the cockpit, visible through the conveniently located cabin sliding door and based on the Stug’s interior floor part. Note the gaps left when the wing ‘root’ fairings were removed from the engine booms.
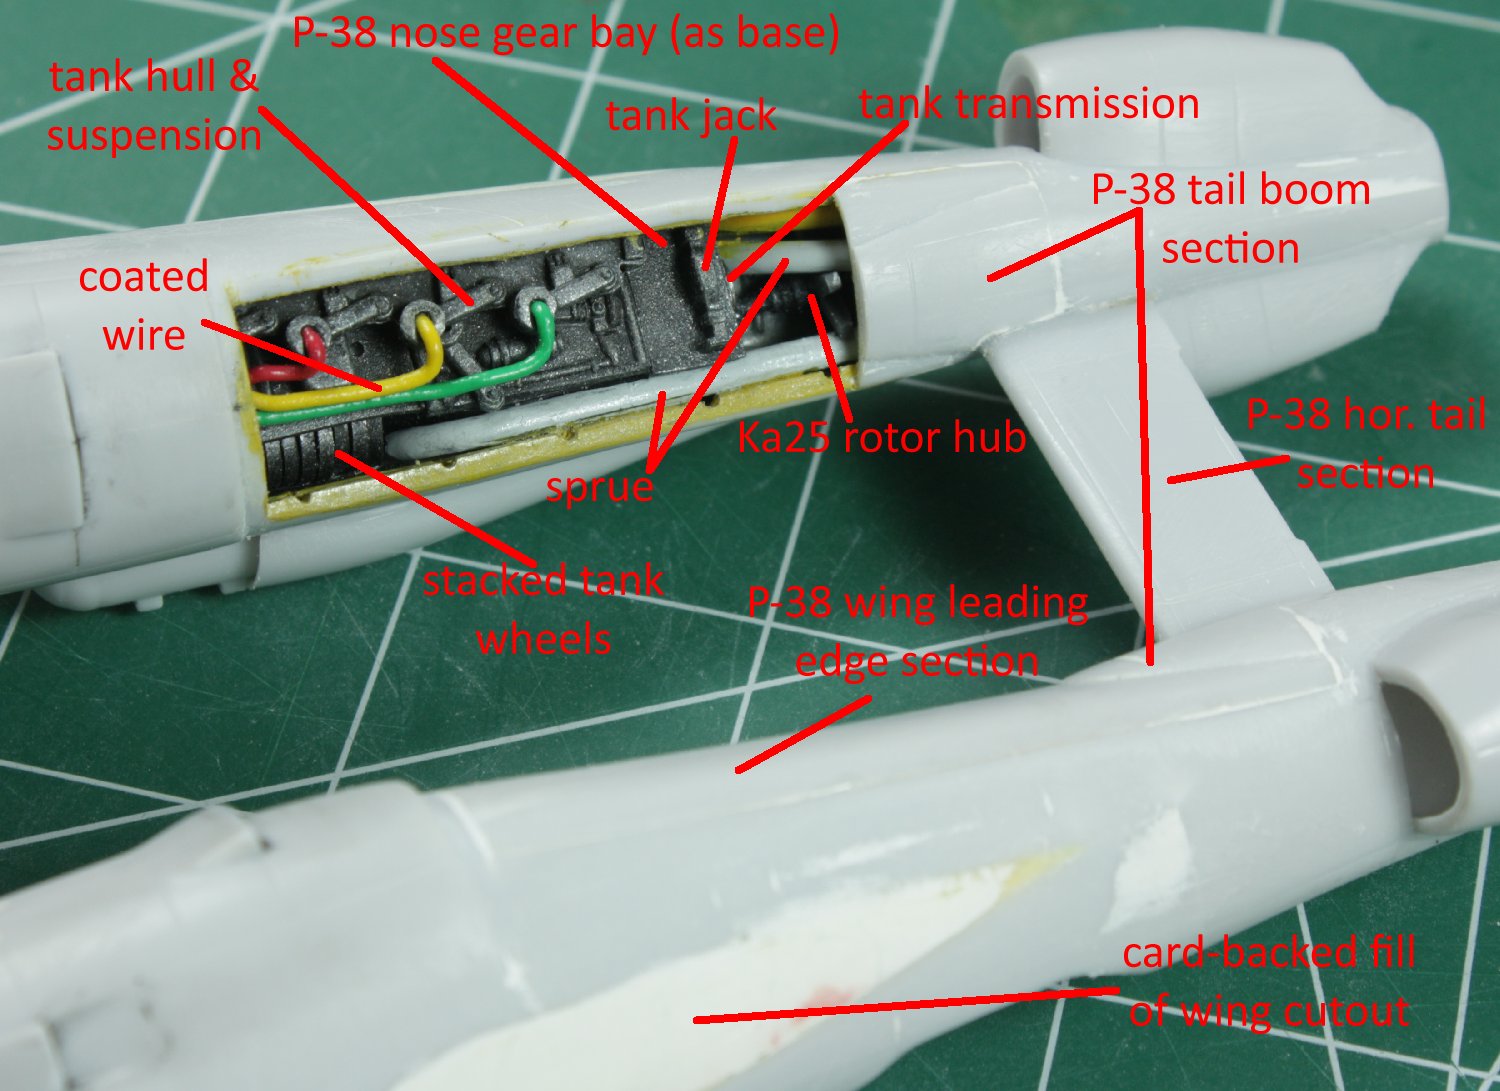
The engine booms were joined by a portion of the P-38 horizontal tail, reduced in chord and length. This “spar” passed through the lower part of the Ka25 fuselage, keeping things close and compact. The helo kit also provided some cool looking “ring” style floatation bags that mounted on the landing gear struts. These became some kind of ‘electronic’ mechanism.
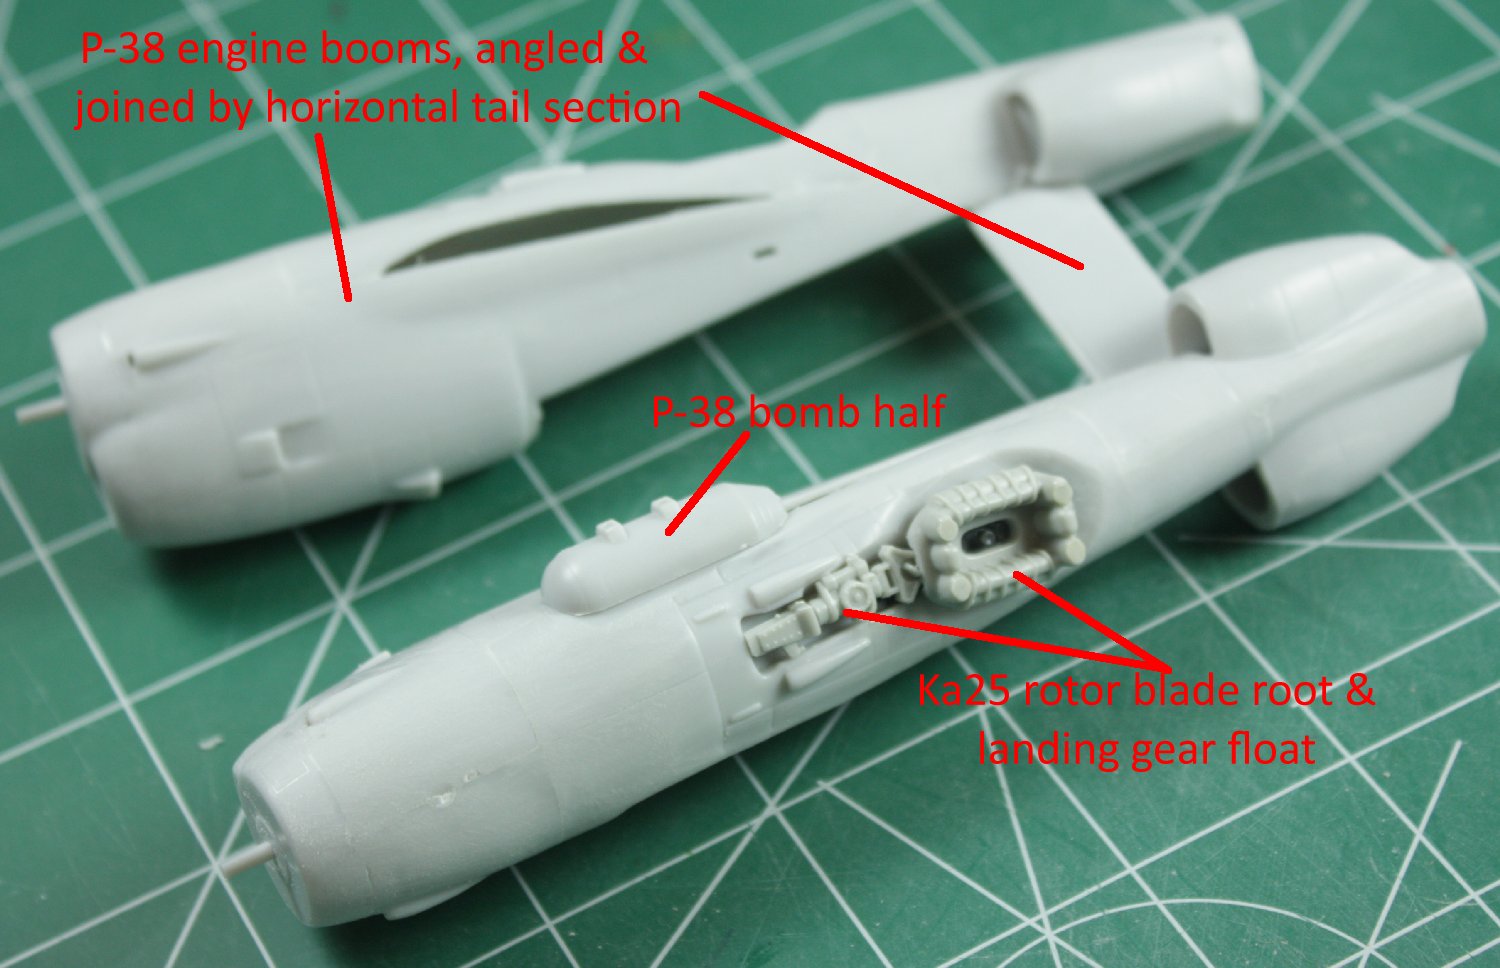
 A later, more developed (and cluttered) ‘map’ of the engine booms, showing how I built up an open bay for the ‘anti-gravity suspensor engine’ within the P-38’s main gear well. The AGS engine used the excised P-38 nose gear bay for its main bulk, layered with Stug ‘bits’ such as the jack, stacked wheels, rear driver transmission and a modified side hull plate, surrounded with various small parts. Even some sprue was used to make the large ‘cooling trunks’, all in an effort to provide an impression of bulk, complexity and mechanism. Taking a core shape (or armature) and layering with surface details is a key concept of this technique, which famed modeler Shep Paine called ‘gizmotology’.

Here is an illustration of how I used an angled ‘slice’ of the cut-off tail boom to make a fairing for the plates I applied to cover the main gear openings. The plates themselves were cut from the P-38’s wing leading edges from the top, outer panels which required a bit of sanding to achieve the correct contour.
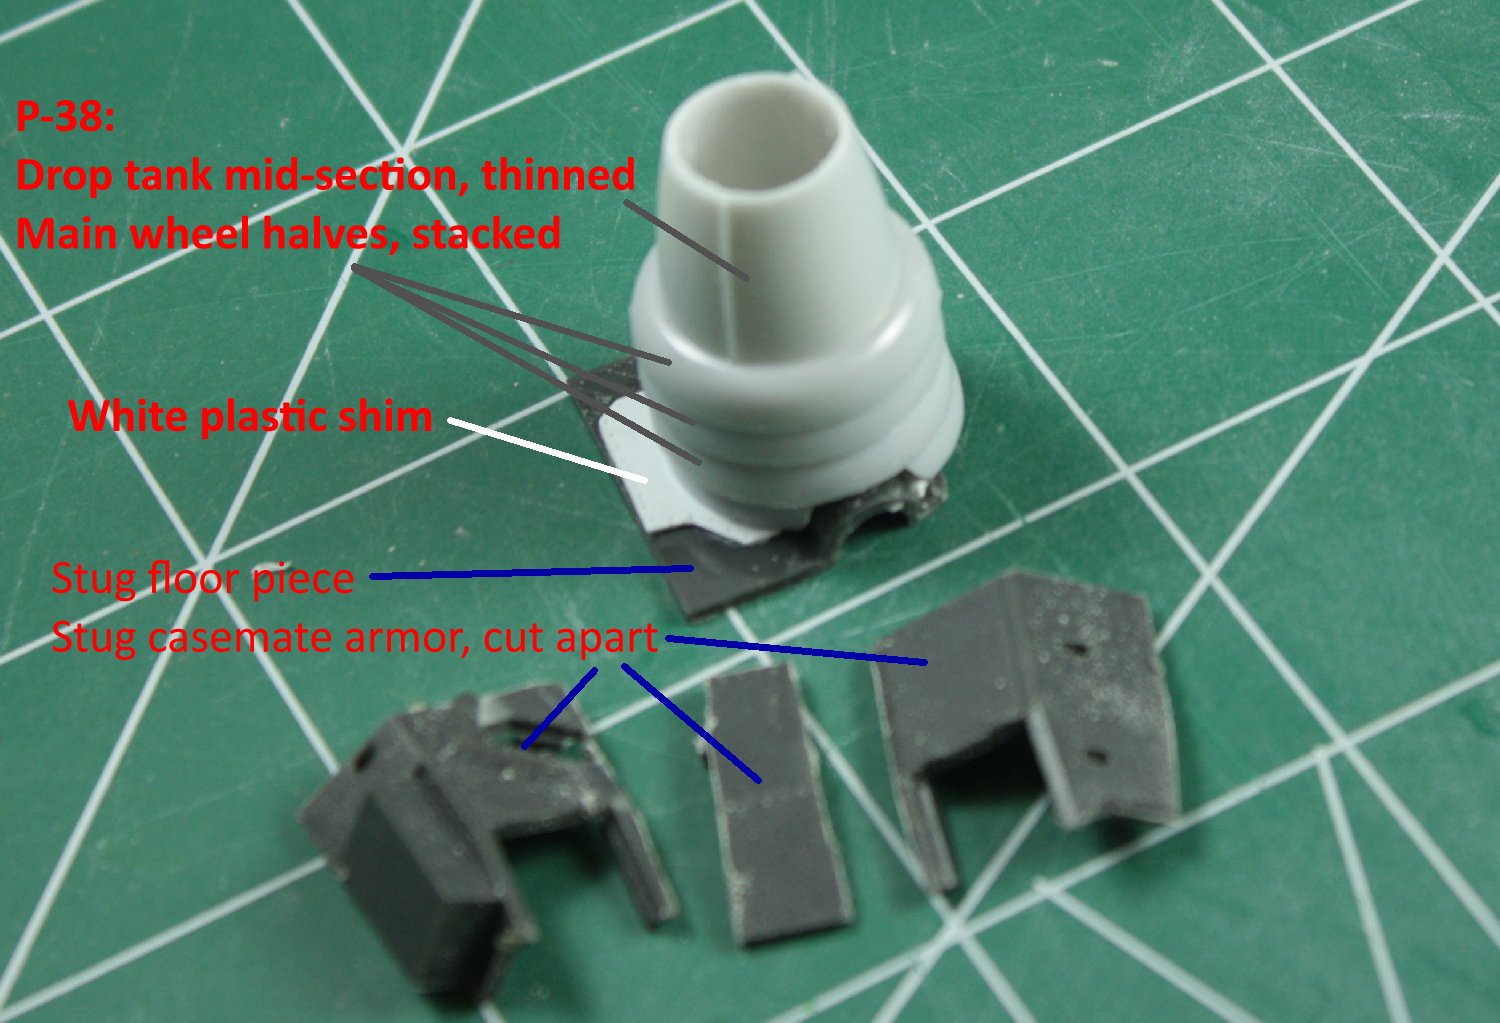
The aft “scoot” engine exhaust was made from Stug and Lightning parts, as the notations indicate. A piece of sheet plastic was used to shim the Stug floor plate & give a solid base for the stacked P-38 main wheels. The Stug upper casement sections are used as armor shields around the engine. The exhaust cone was made from a section of a drop tank, thinned and smoothed. These are examples of visualizing a shape and then finding the desired shape within the existing parts. Since the exact part is not always available directly, you have to ready to do some modification – which is part of the fun.
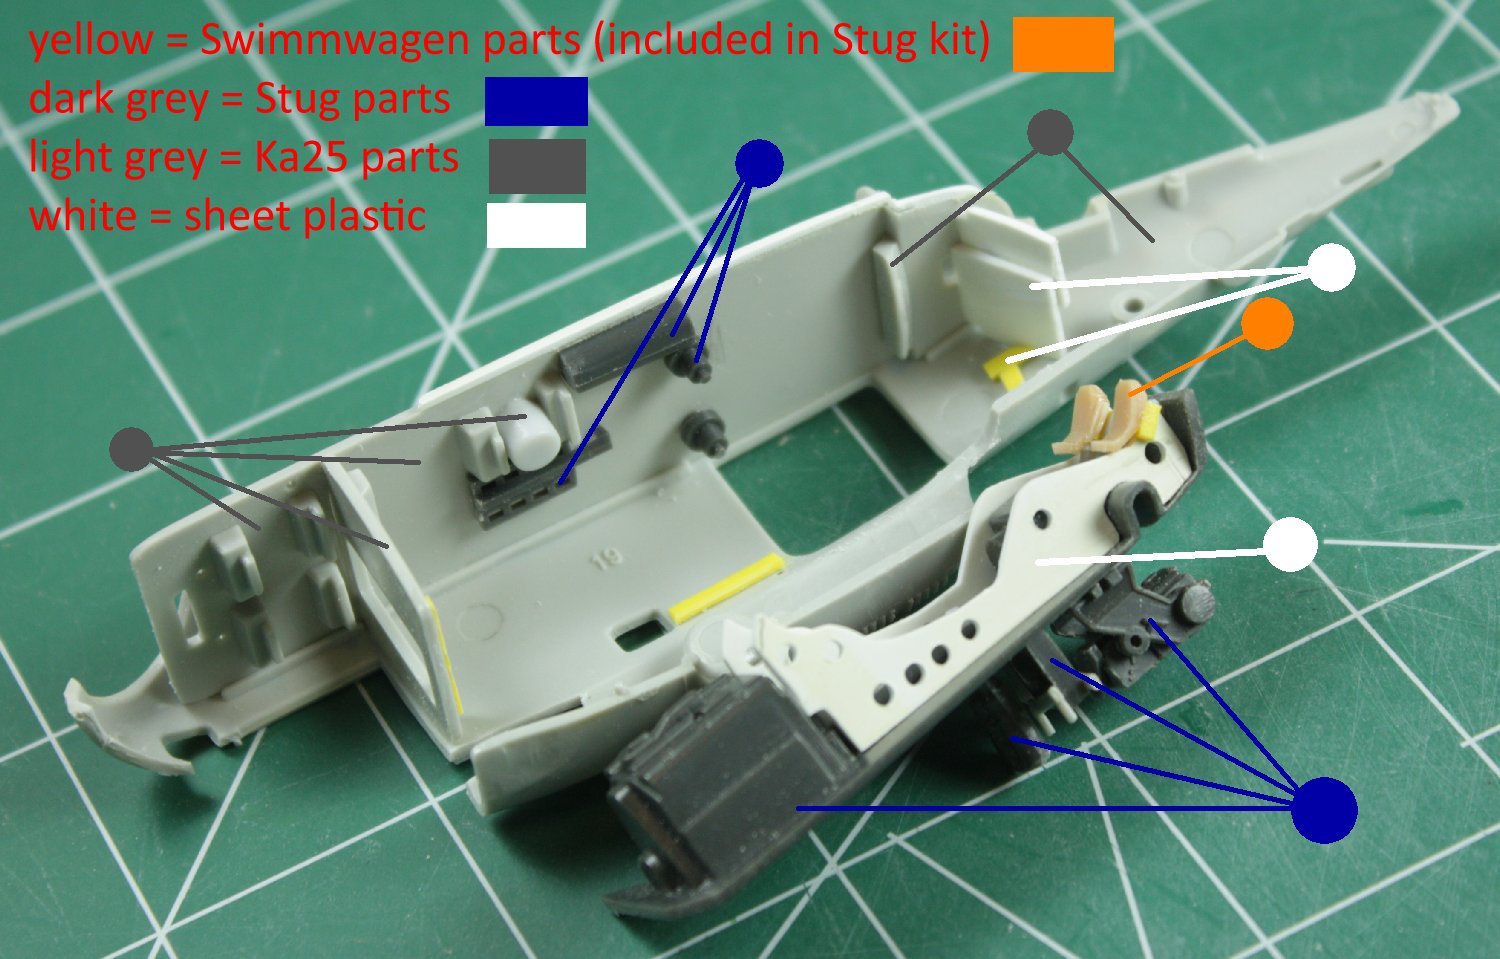 In spite of my best intentions, once I had the total concept decided, I had to fabricate some parts in the cockpit in order to produce the 1/48 scale model I desired. Primarily, the recumbent pilot’s couch was built using sheet plastic, as was some of the starboard interior details. I still relied heavily on the cornucopia of tiny, detailed parts provided by the Fujimi Stug to give a boost to the visual complexity needed. The color-coded pointers are used here to explain the source of the added parts.
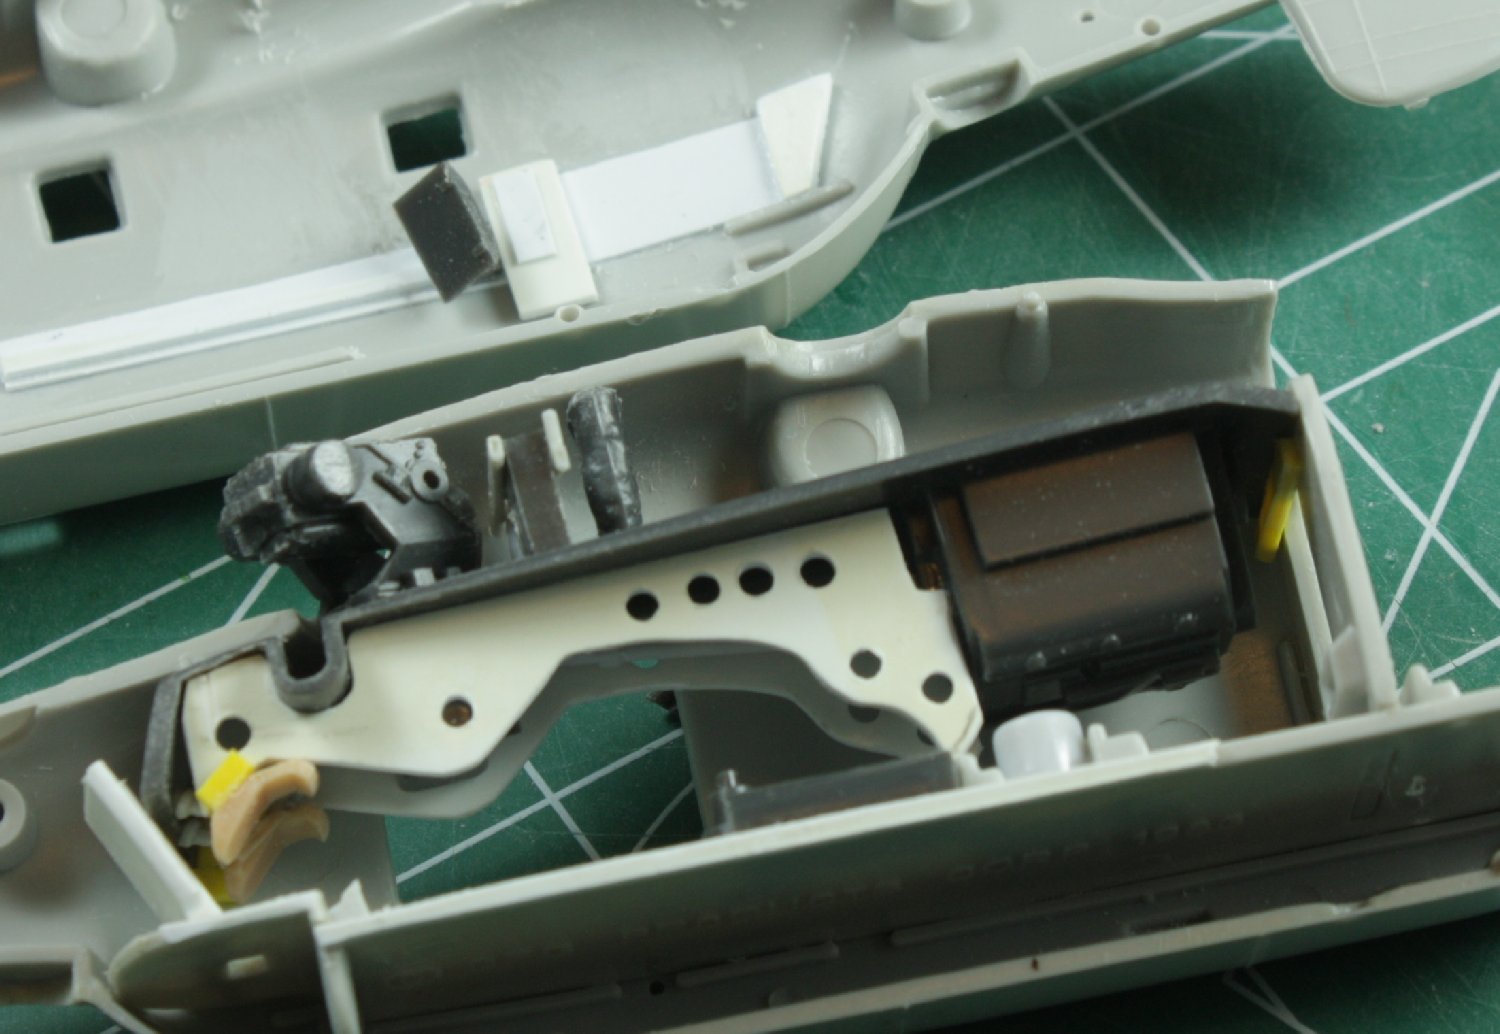 Close up showing the port and starboard halves during an interior ‘dry fit’. Note that below the cockpit floor and ‘aft’ of the gun mount, I used the lower half of a Stug crewman (with other items) to block an anticipated ‘see through’ problem.
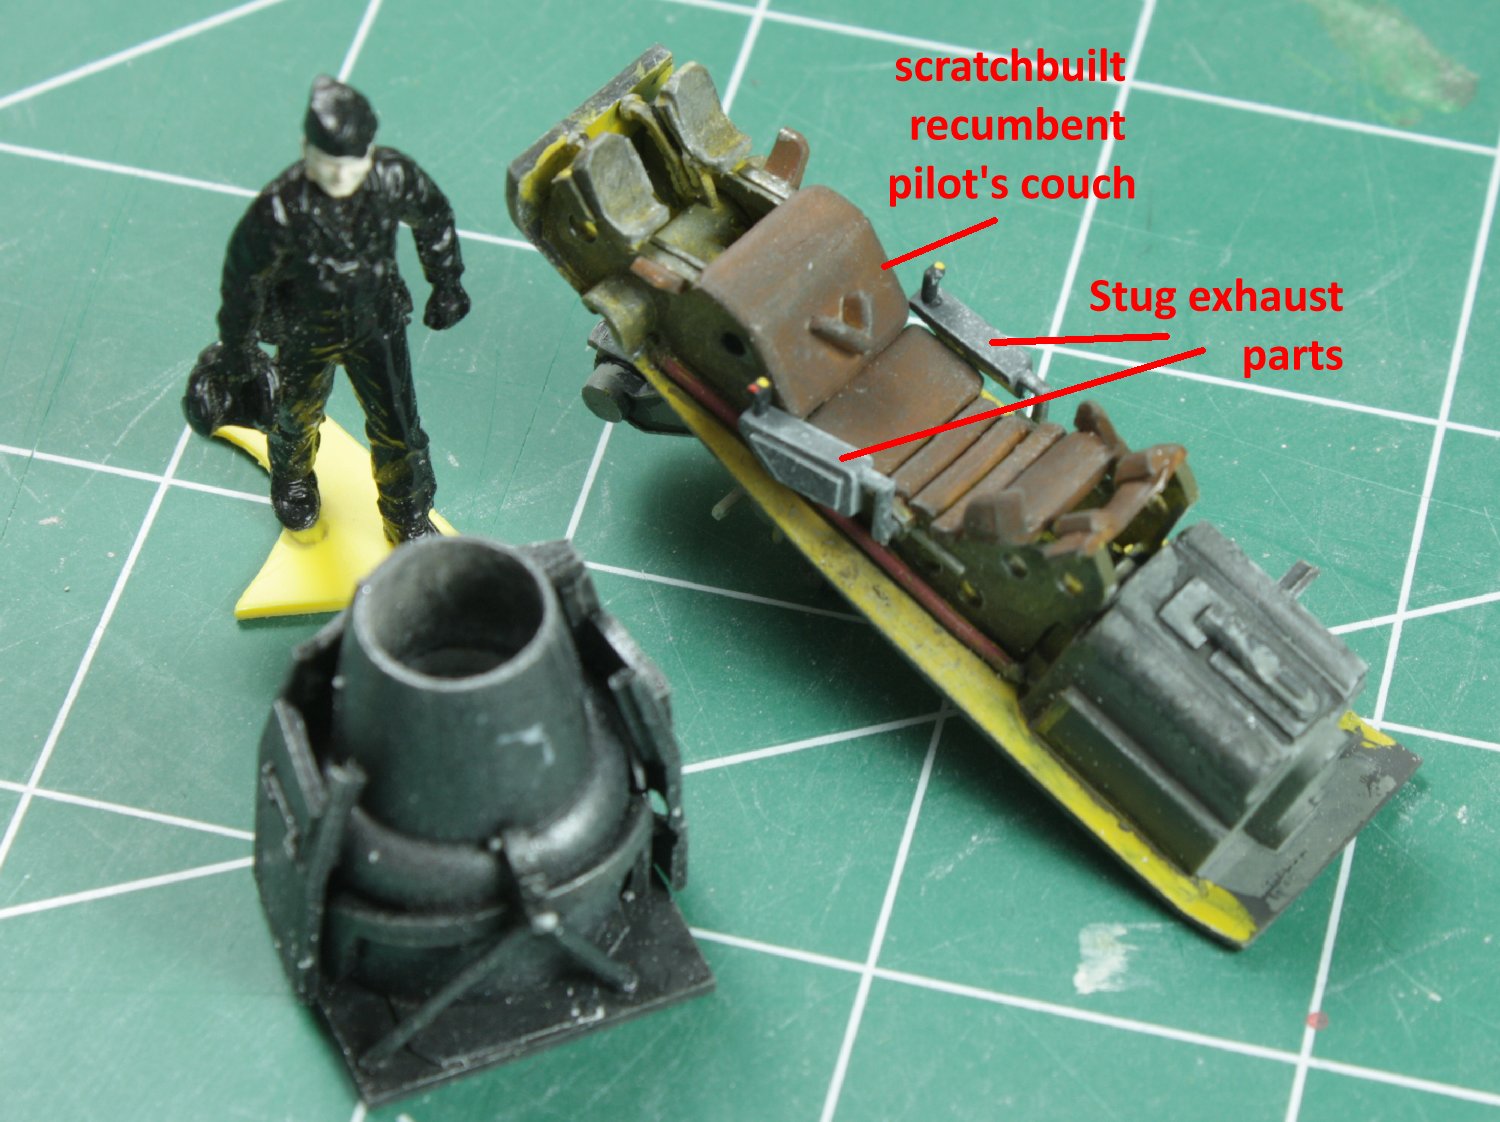 Painted and drybrushed, the ‘hash’ of parts looks quite effective. I added kebuka tape (Tamiya brand) seat belts with Stug ‘bits’ for buckles later. I wanted to have side mounted ‘controllers’ which the Stug’s exhaust mufflers provided for nicely.
 Once painted up, the interior looks the part and belies the ad hoc collection of parts used.
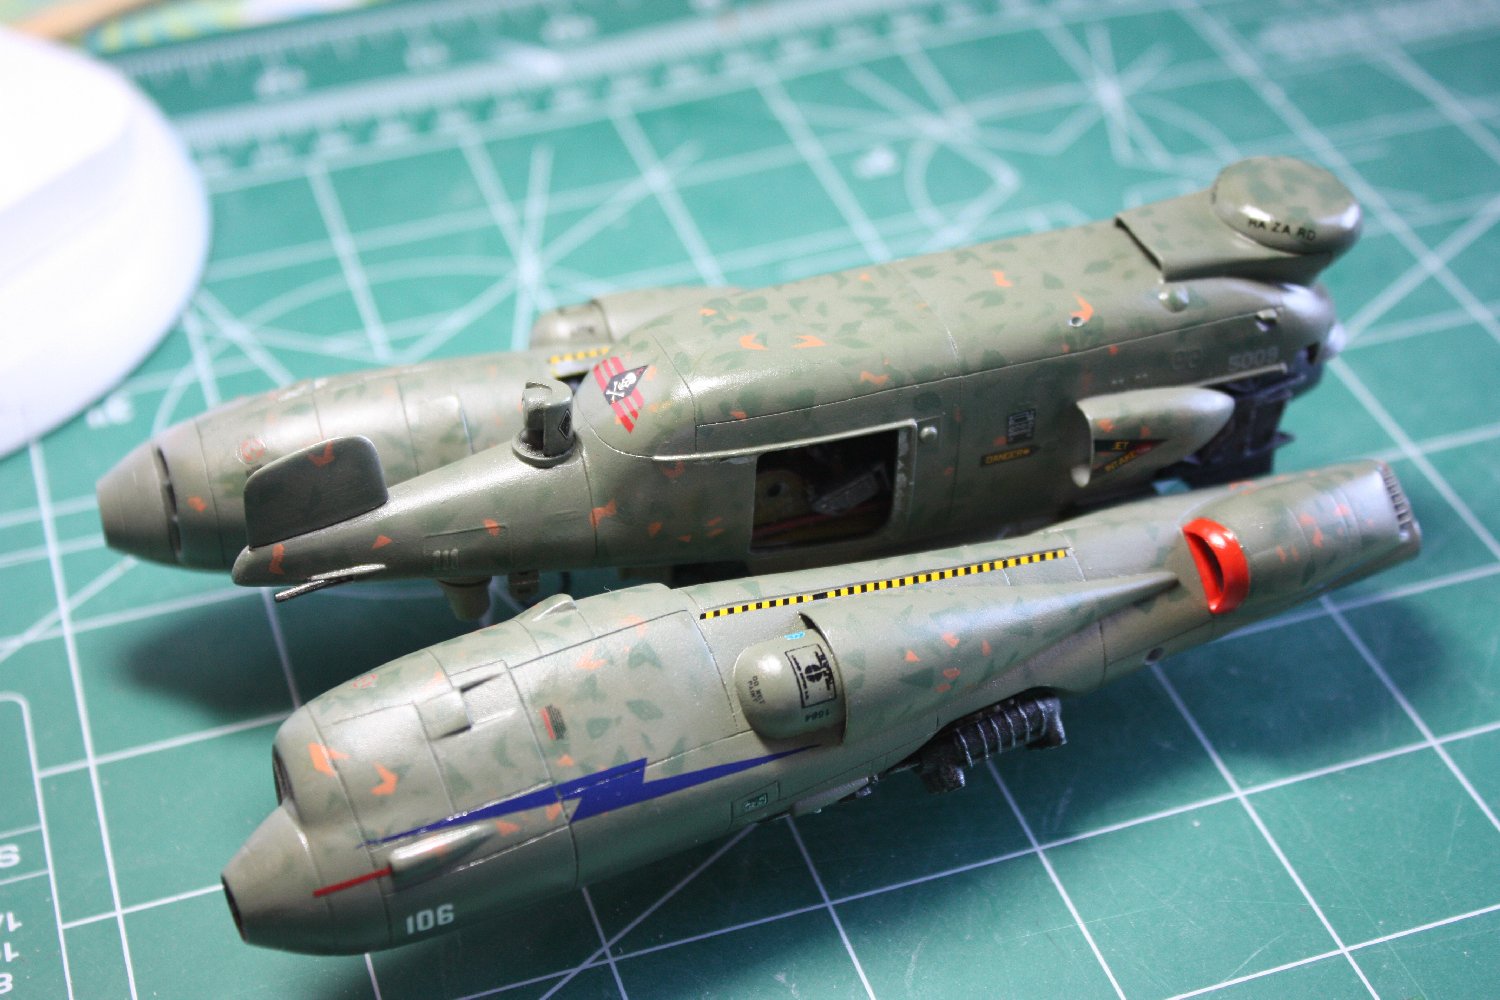 Jumping a way down the line, here is the Scout assembled, painted and decals applied showing the port side.
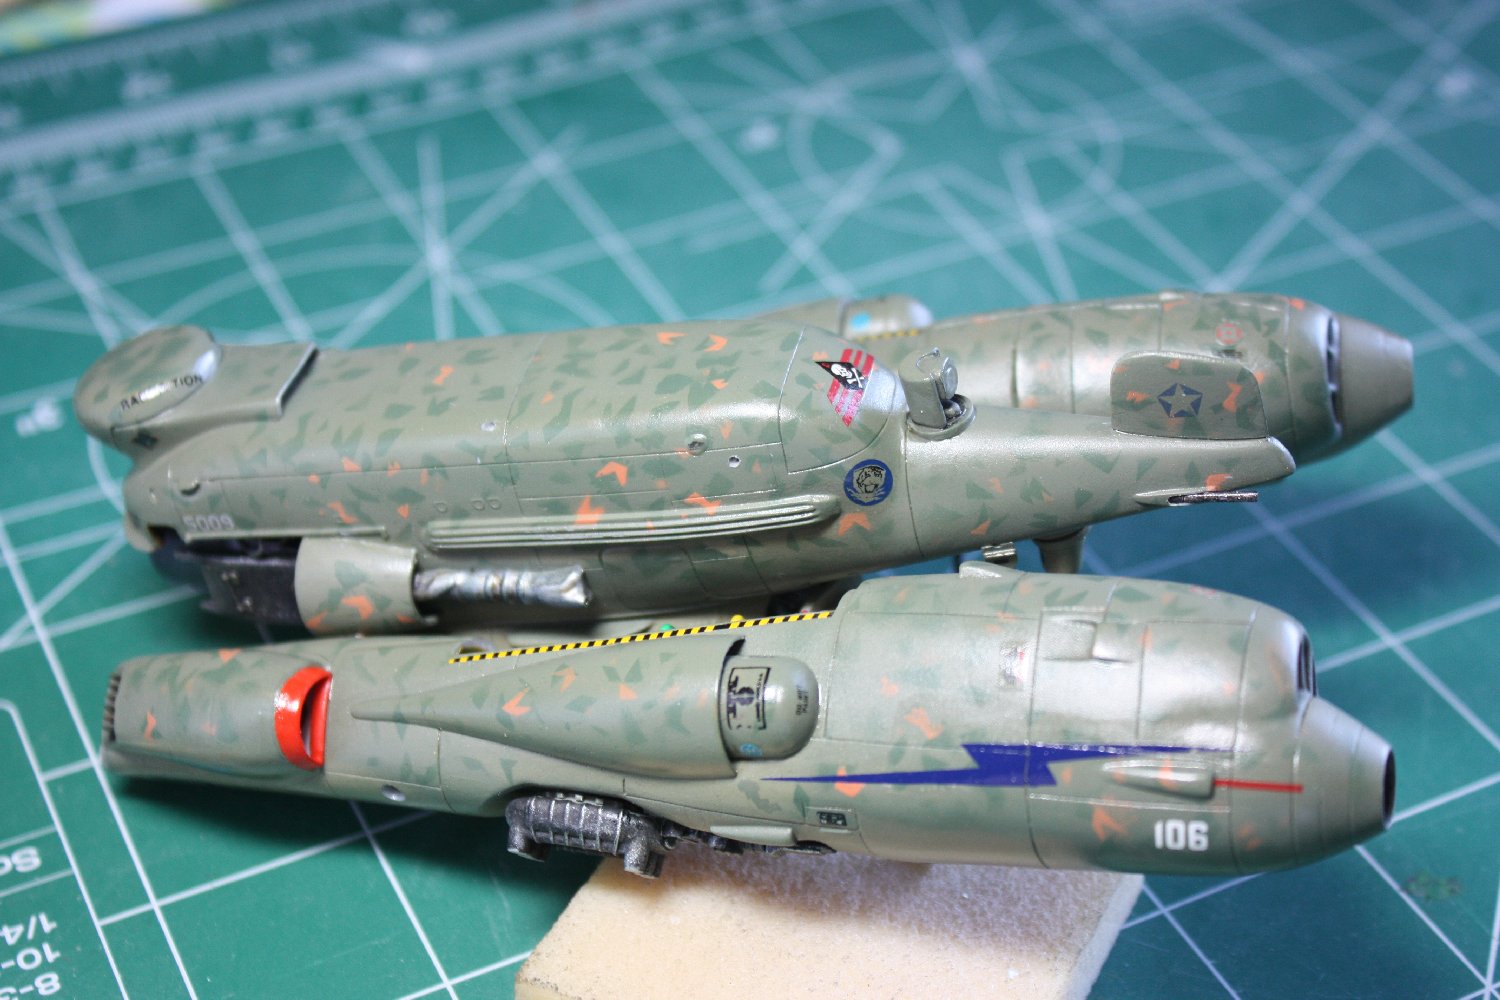 Here is the starboard side. Paint scheme is a countershaded green and tan covered by a random ‘leaf’ pattern applied through a hand held paper mask.
 The shine of the finish is due to the “Pledge Multi-Surface Finish” – aka “Future” – used to apply the decals, gleaned from various scrap sheets. The donor kits’ decals didn’t offer much so I had to go into my archive of leftover kit decals, handmade and Microscale railroad data sheets. I even used the ‘Bombshell Decals’ logo from one of their sheets as the nose art (the logo was also decaled, not just printed.)
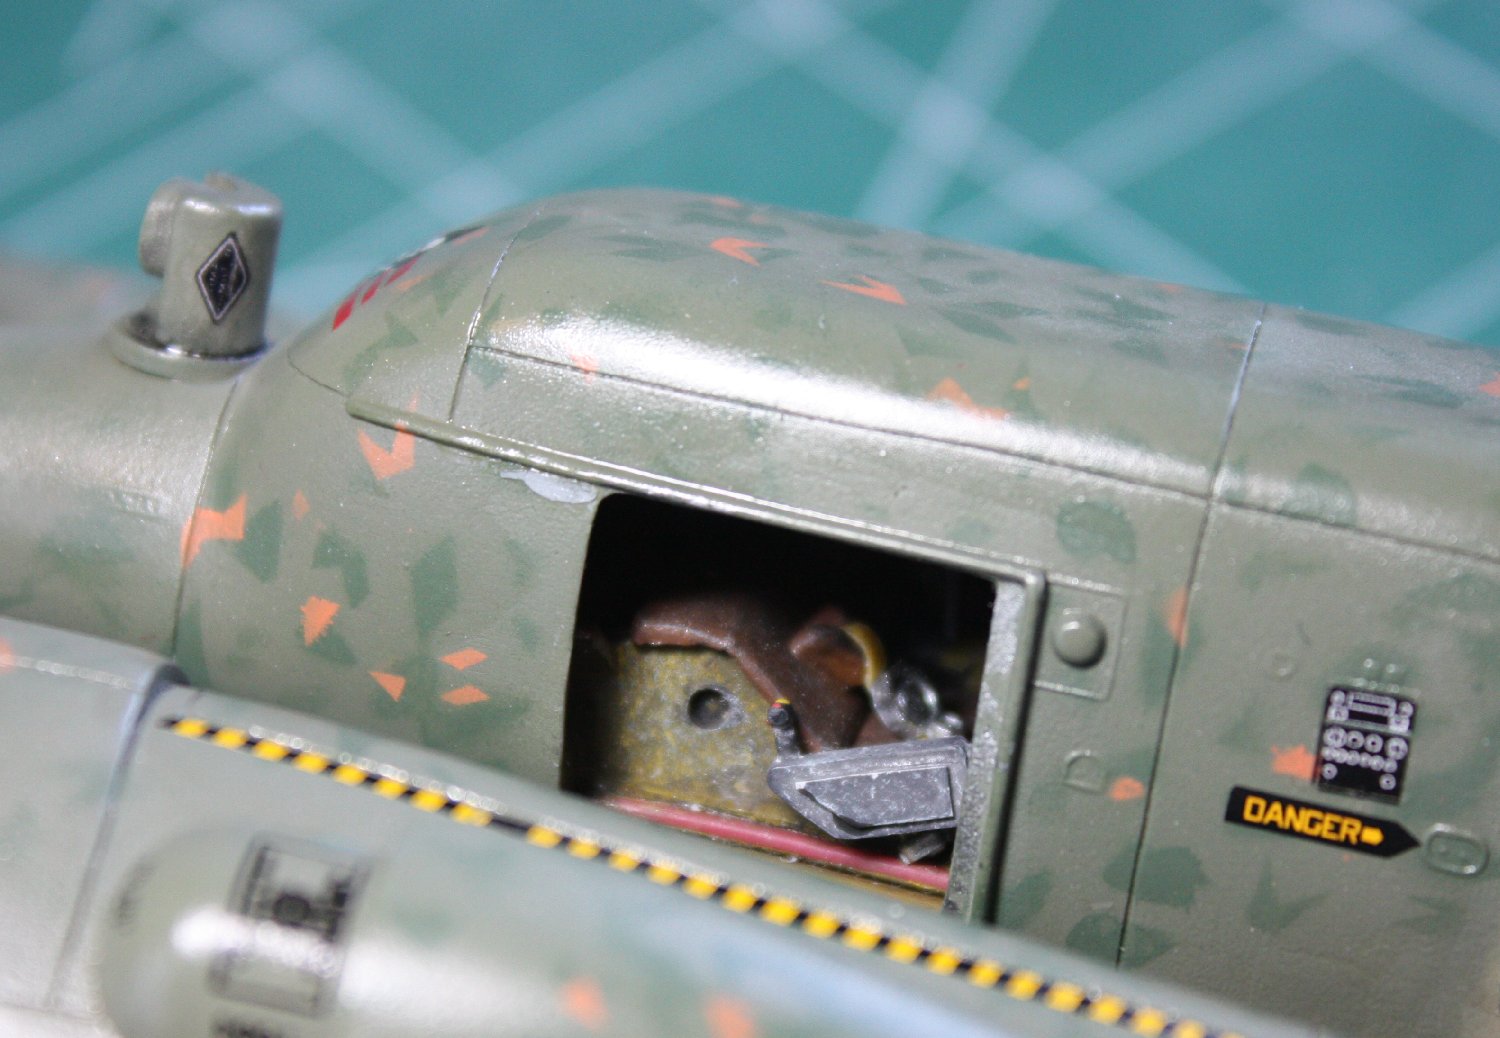 Close up view of the cockpit hatch. Notice the railroad data plate on the ‘sensor turret’. Microscale sheets in various scales provide well printed, thin and intricate options for adding visual complexity.
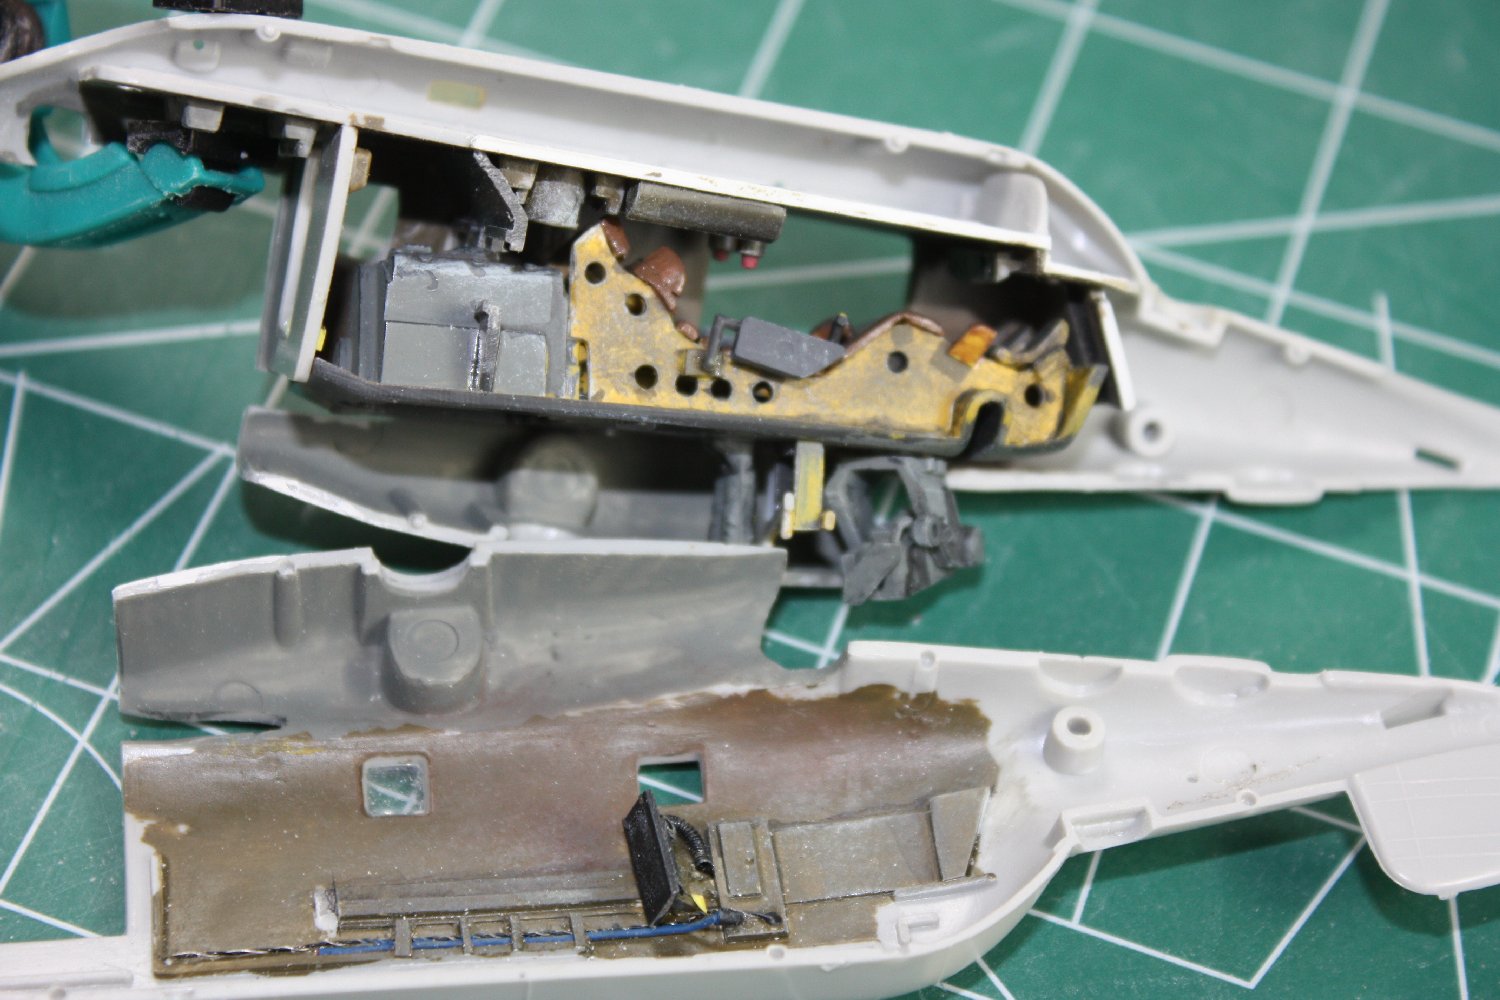
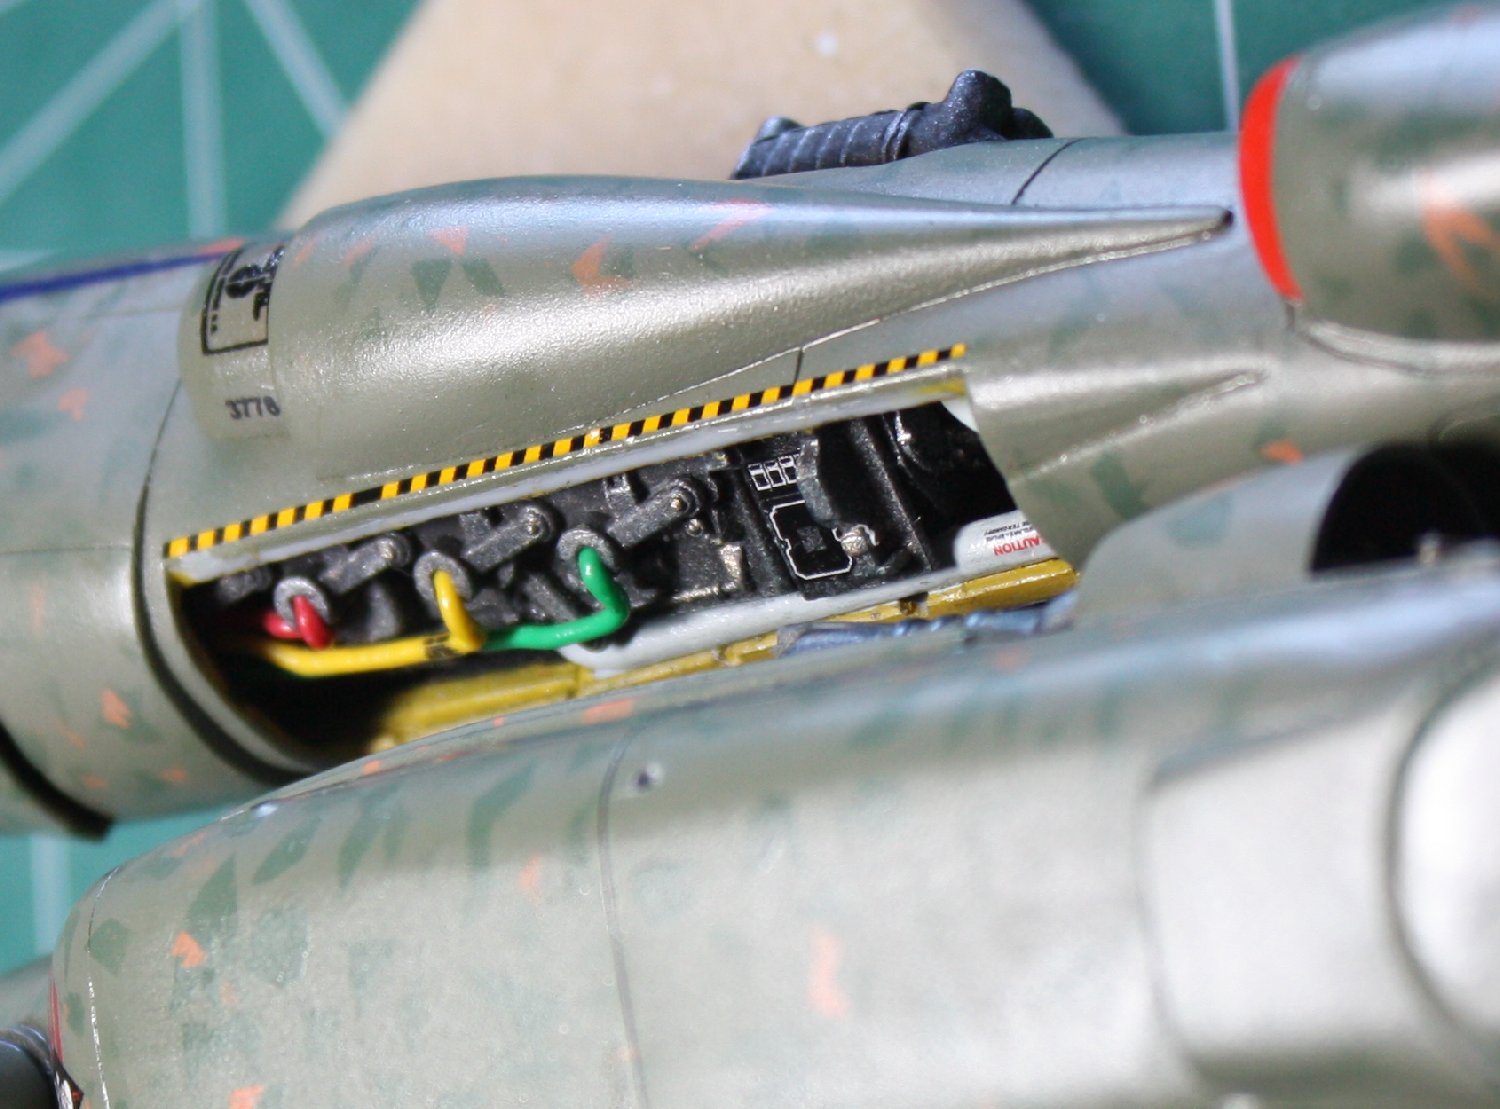 Compare this view of the engine bay with the previous one. The decals added perfectly illustrate the concept of ‘visual complexity’ as a means of improving the impression of realism.
(More to come when I’ve completely finished.)