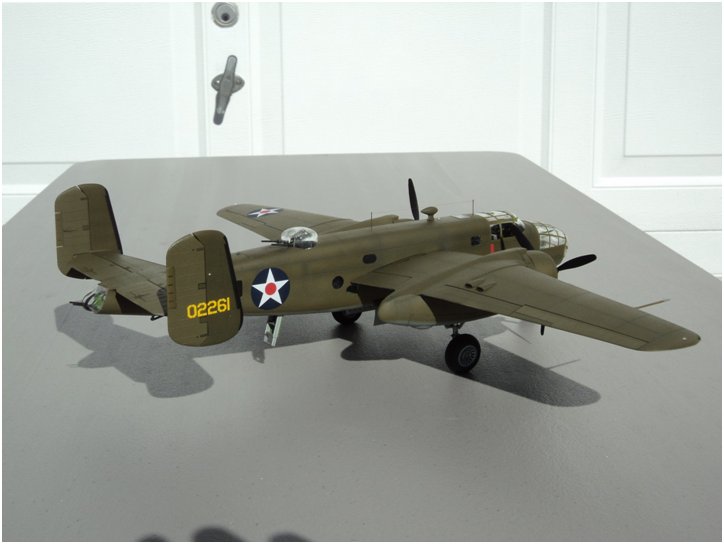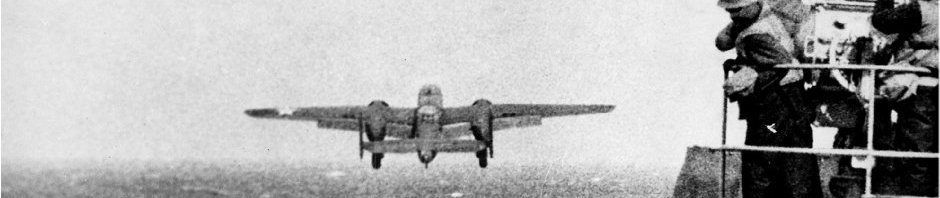
 I obtained this kit (#3430) soon after its release in 1999. Construction, however, was finally started in January 2012. Overall, the kit was excellent, but it had a few inaccuracies. In a nutshell, the B-25 Mitchell had a glorious, historically significant career. However, most of the B-25’s contributions to WWII were via later variants – the B-25C/D, B-25H and B-25J. Of the over 6600 B-25’s built, only 120 (119 delivered) of them were the early production “B” model used for Jimmy Doolittle’s famous “Tokyo Raid”.
Construction & Correction: Unfortunately, the Accurate Miniatures kit is closer to a “C/D” variant so, I had some corrections to do in order to make it into an accurate “B” model. An excellent source of aftermarket parts for this kit was found at Bruce Radebaugh’s Parts R Parts. I used resin parts procured from the Parts R Parts website for the following: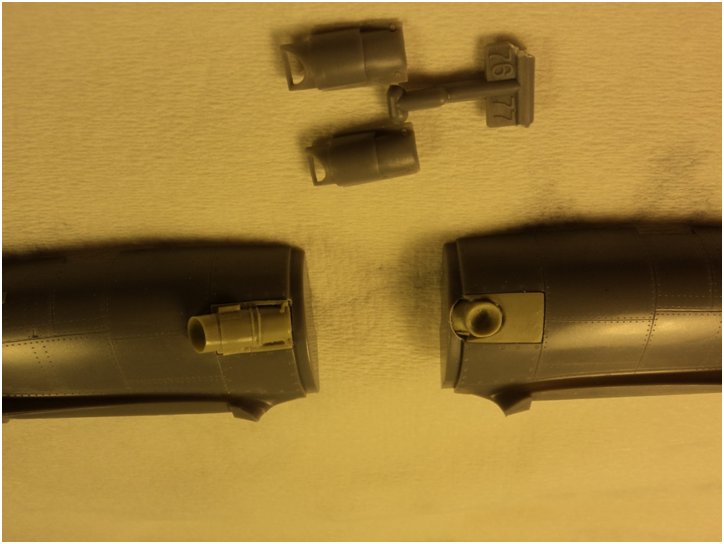
- Replaced the kit’s exhaust pipes. Early B-25s had a long exhaust pipe on the port engine, and a short stubby one on the starboard engine. The supplied kit parts were identical parts for both sides, and they didn’t come close to what either exhaust pipe looked like.
- Installed a 60 gal fuel tank in the place where the aft bottom turret was removed. This was a modification to all aircraft used on the Doolittle Raid.
- Installed a 500 lb incendiary bomb. Plane #7, like most of the other planes in the Doolittle Raid, carried three 500 lb general purpose high explosive (HE) bombs and one incendiary bomb. The kit just gave you HE bombs. If you want to build LT Col Doolittle’s plane, you’ll need four of the incendiary bombs.
- Replaced the kit’s cowl flaps and upper cowl scoops with the much more accurate resin parts.

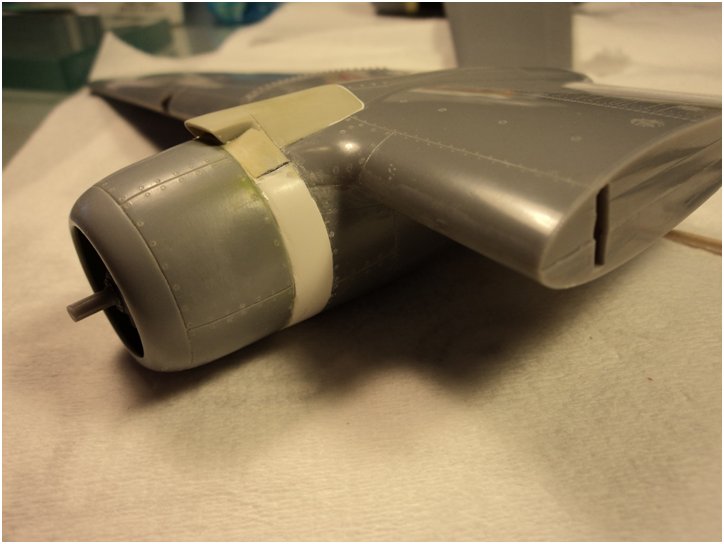
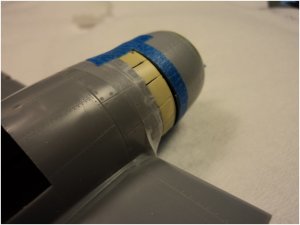
I had also procured and used a set of out-of-production Cutting Edge corrected engine cowlings, designed to replace the incorrect kit parts. The too small engine cowling opening also could have been easily fixed by opening the front of the cowlings a bit using sandpaper wrapped around a dowel. Other corrections to the kit included:
- Port & starboard wing tip mounted navigation lights were molded to represent later variants of the B-25. I sanded those off and installed new navigation lights in the correct position for a B-25B. I used leftover clear parts from a Hasegawa P-40E kit.
- Added a light to the upper fuselage, just forward of the direction finder.
- Air-to-ground signal lights were molded into the bottom of one of the wings. These were not present in early B-25s so I filled in these lights.
- Outboard fuel caps were molded into the wing tops & these also were not present in early B-25s.

- Removed fuel vent pipes molded in the rear of the engine nacelles. Again, a later feature.
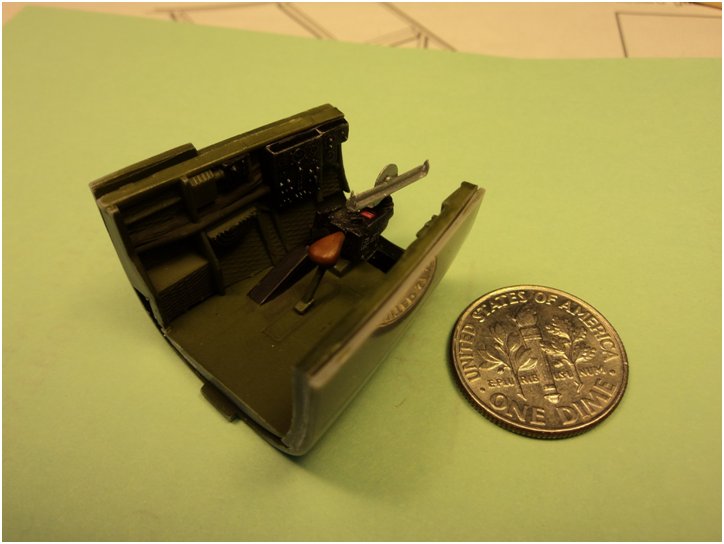
- The kit provided a part for the Norden bombsight which was removed from the Doolittle Raider aircraft for a couple of reasons: 1) We didn’t want them falling into enemy hands, & 2) the sophisticated Norden bombsights were ineffective at low altitude (bomb runs for the Raid were at 1500′.) The Norden was then replaced with a simple aluminum “sighting bar” that better facilitated low altitude bombing. This ad-hoc bombsite was called a couple of names: “Greening Bomb Sight” (after the person who designed it) & the “Mark Twain” bombsight. Anyway, I scratch-built this bombsight out of Evergreen plastic.
- To represent an armor fuselage reinforcement plate aft of the upper turret, I painted decal paper, cut it to shape and applied it.
- Added ‘fake’ gun barrels to the rear gunner’s position per the kit instructions (not really a correction but should be noted.)

I did have one major fit issue with the starboard nacelle-to-wing joint. While half of the nacelle to wing joint was fine, the other half had a major step. I used a large dollop of Milliput epoxy putty to fill in the step, smoothed out while it was still wet and once dry, I sanded it before I re-scribed the cowl flaps.
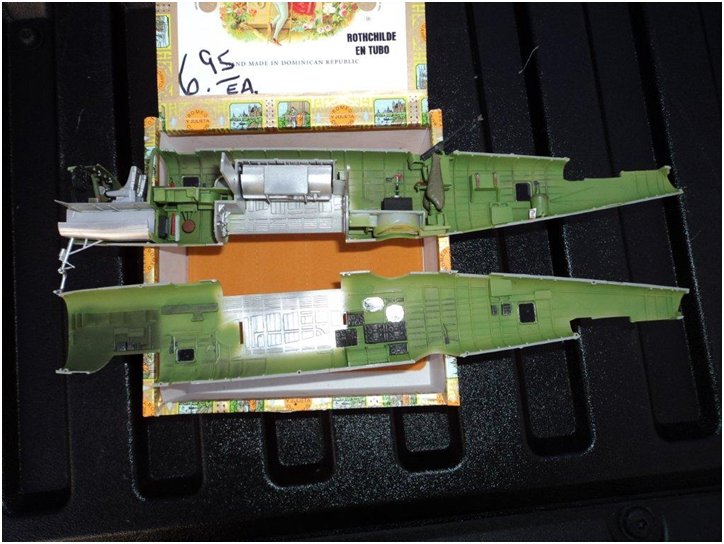 Painting: I did a lot of research to verify the correct interior colors. The interior of most WWII aircraft was predominantly “zinc chromate green”. The kit directions called out a lot of aluminum and dark green within the interior. As it turns out, the directions were pretty accurate. The aluminum color actually represents a clear corrosion preventive that was impregnated with flakes of actual aluminum (aka ‘leafing aluminum’), then applied as a paint. This ‘aluminum’ is the color of the bomb bay and wheel wells. The flight deck and bombardier section of the plane was painted dark green at the factory. (The model has a very nicely detailed interior which unfortunately is mostly not visible.
 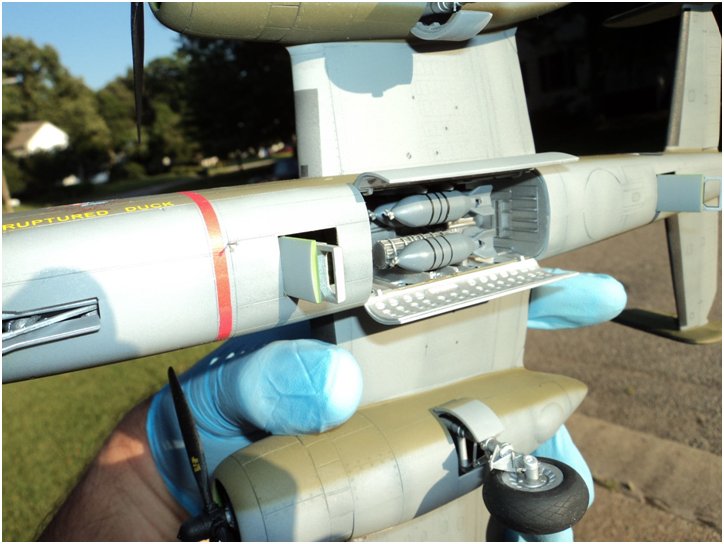 However, it is all in there and you can see it in the pictures.)
For the exterior, I pre-shaded the panel lines with black before applying the Olive Drab over Neutral Grey scheme top colors plus a lighter shade of Olive Drab on the control surfaces. The deicing boots were a challenge -lots of tape to mask! Once the boots were masked off, I painted them flat black.
Finishing: The kit provided decals for all 16 Doolittle Raider aircraft. I chose to build Plane #7 “Ruptured Duck” because of pilot Ted Lawson’s book “30 Seconds Over Tokyo”, an incredible story of an incredible mission.